|
This
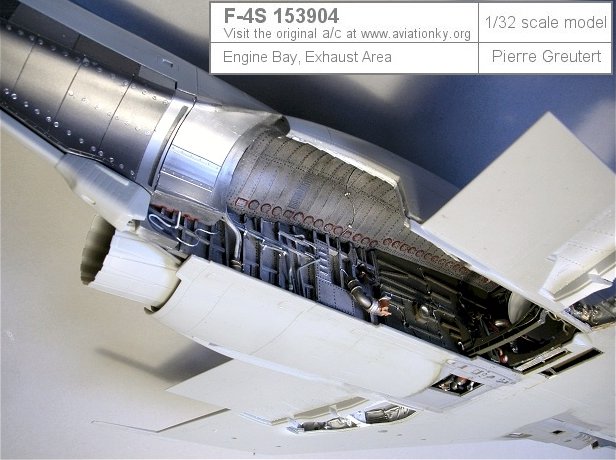
picture shows the aft underside of the model. I opened the R/H engine bay access
panels, and scratch-built the inside with styrene, wires, tubes, etc. The
missing engine will be scratch-built as well, and eventually displayed beside
the finished model.
A
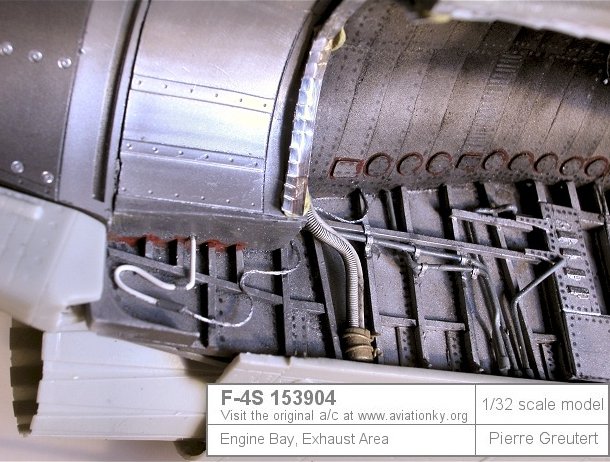
close-up view of the rear area of the engine bay, showing the keel fairing
removed, heat-sensor lines and the afterburner can finger-seal. The later item
– still glued with yellow Tak-O-Tac pads - is made with a small strip of
aluminium, cut away from one of my wife’s pastry backing pans. :-)
The
arrestor hook – partially visible to the left - is still unpainted. Note the
numerous round, red-sealed access hatches to the bladder fuel tanks, located in
the spine of the aircraft.
|
Click on images below to
see larger images |
 |
 |
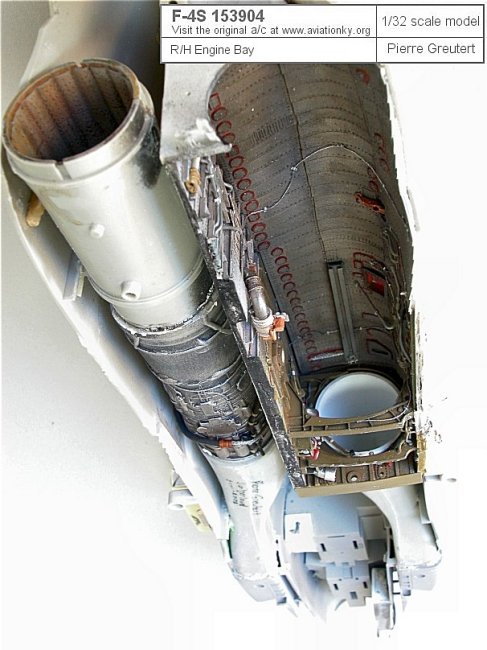
This
photos above show - on the left hand - the model engine bay versus the real bay.
The shooting angle is not quite identical, as I could not squeeze my camera any
further into the model. But you can see that almost every “real stuff” is
there on the model. The most visible difference is the colour of the air intake
duct, which is white on my model (traditional duct colour), and metal grey on
this particular 1/1 Phantom.
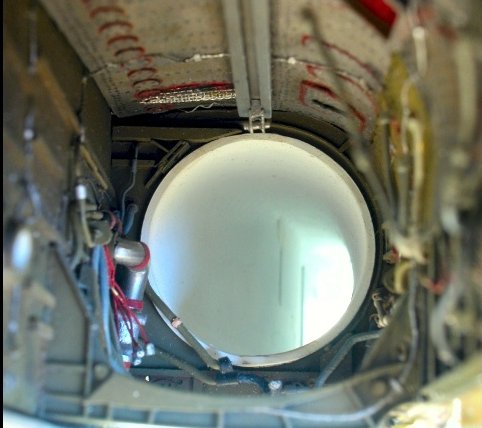
Here
is the underside of the model, with the bottom removed. It shows the complex
geometry of the inside of the model. In particular, you can spot how the air
flows from the intakes to the engine, through the white inlet ducts.
The engine
position is clearly visible on the L/H mock-up, a black-painted plaster mould. A
later article will explain how and why I did this part.
The
afterburner can is the original Tamiya piece, from which I kept only the left
side. The exhaust nozzle is missing, as it undergoes a heavy surgery process
too.
I
hope you enjoy the series.
Pierre
– Scale
PhantomPhixer
A
few words about myself
|
|
I
am a Swiss modeller, 49, working as Information Systems manager in an
international software company.
I started plastic modelling a few years ago, when I could set-up my
own workbench room in the basement of my home. My 3 kids (19-16-10) often
drop by to watch the progress on the Phantom project.
This
is my first large-scale model, where I try every possible modelling
method: out-of-the-box combined with styrene scratch-building, cast and
moulding, brass photo etching, etc. |
| This
leads me often to “undo” some work, as I find a better method to do
it. The project started early in 2001, and there is still a hell of a lot
ahead. :-) |
|
|